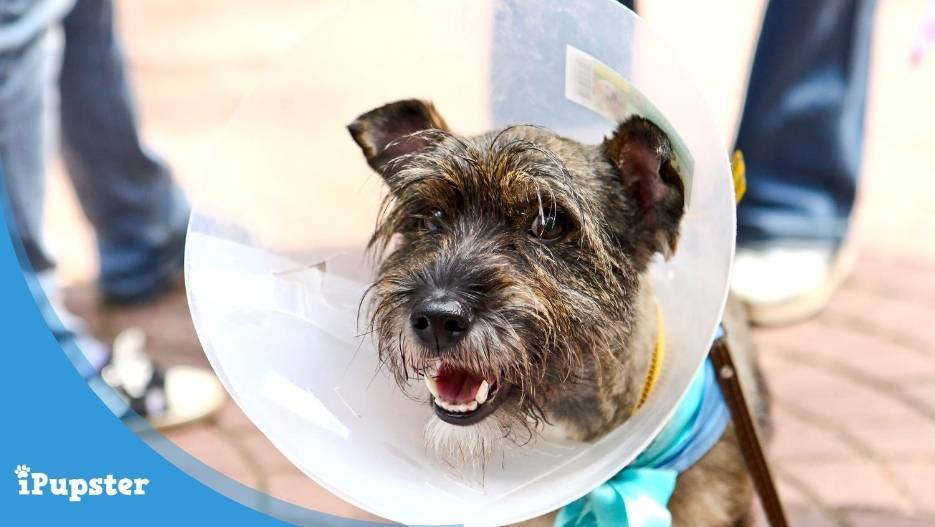
The dreaded dog head cone goes by many other names including an e-collar, Elizabethan collar, and sometimes “Cone of Shame”.
While this nickname sounds bleak, we dog lovers agree that these cones serve a vital purpose when our dogs are recovering from various health issues. Learning how to make a homemade dog cone collar can help you save money next time your dog needs to wear one.
In this post we cover some reasons why dogs wear cones, how to make sure the experience goes smoothly, and the pros and cons of made at home dog cones. We also share our list of the 10 best DIY protective collar designs you can find on the internet.
Let’s begin!
When Do Dogs Need To Wear A Cone?
There are various reasons your canine friend might need to wear a dog cone, not
Your dog may need to wear one several times in their lifetime due to:
- Spay/neuter
- Yeast infections
- Skin conditions
- Allergies
- Problematic chewing
- Flea infestations
- Surgery
Since most dogs wear the “Cone of Shame” at least once, the best thing we can do as owners is inform ourselves on how to make an Elizabethan collar and care for a dog wearing one.
Being prepared can make the process easier on us and our dogs, and hasten the removal of pet head cones.
Also Read: How to Make DIY Dog Diapers
E-Collar Hacks & Tips
Dogs understandably don’t like to wear e-collars. They’re bulky and uncomfortable, and make it hard to see everything and play like dogs usually enjoy doing.
Some may hinder your dog’s ability to eat and drink.
Many dogs try hard (and occasionally succeed) at removing or destroying their cone. If they manage to lick or chew themselves it could prolong the healing process. This is where a homemade dog cone alternative can be very helpful in a pinch.
Here are several ways to support your dog and encourage them to keep their cone on during the healing process:
Be strict, don’t let them off the hook because they look pitiful. The DIY cone of shame is for their own good.
Check for abrasions to make sure the vet e-collar or your DIY collar isn’t hurting your buddy where it touches their neck, ears, and/or shoulders.
If your dog is struggling to eat or drink while wearing their collar, you may choose to remove it during meal times. Just make sure to supervise so your dog doesn’t pick at anything they shouldn’t, and put the collar back on as soon as they are finished.
Get ready to guide your dog around the house, since their peripheral vision may be impacted by their new accessory. Be mindful and watch your dog to make sure they aren’t bumping into things and there is no risk of them falling off the stairs, into a pool, etc.
Take Note
If it’s your dog’s first time wearing an e-collar they may be scared or confused. Try to make the process as positive as possible so they don’t mind having to wear one again if they need to.
Also Read: How To Make A DIY Dog Wheelchair
Pros and Cons Of Making Your Own E-Collar
Finding a commercial dog cone alternative is easy enough these days. They’re available to order online through places like Amazon and Chewy, with different styles that are similar to some of the DIYs mentioned here.
You can get a standard plastic one at the vet, but those can be difficult to remove and put on again.
So you might be wondering, why make your own?
- DIY versions are usually cheaper and use materials most people have at home.
- If you make a DIY e collar it’s easier to fit your dog’s measurements and unique needs. You don’t have to guess at what size to order and most can be adjusted easily after they’re made.
- Standard e-collars are stiff and uncomfortable. Most DIYs incorporate ways to soften the edges or result in a protective collar that’s much softer, lighter, and less restrictive.
- DIY collars are easier to put on and remove. Many owners have shared stories of how their vet-issued e-collars came off and how confusing trying to put it back on was.
However, here's a few negatives worth-while considering.
- Making a diy e-collar for dogs requires craftiness, time, and materials.
- Collars without the cone shape may not protect your dog’s whole body. When you put on your dog’s DIY collar, make sure they can’t reach any areas they shouldn’t.
- Some of these DIYs may be easy for your dog to destroy/remove depending on their temperament.
- Some DIYs listed below are for smaller dogs only.
Even if you choose to go with an e-collar from your vet, it’s handy to have a blueprint for a DIY Elizabethan collar in the back of your mind in case of an emergency.
Most of these take minimal time and expertise, but if you’re up for an arts & crafts challenge there are a couple of those too!
If you enjoy crafts, also check out 7 Homemade Dog Toys You Can Make From Ordinary Household Stuff.
10 Best DIY Dog Cone Designs
If you’re struggling to think, “What can I use instead of a dog cone?” we’ve got you covered.
The internet is filled with clever and useful tutorials, and pet owners have risen to the occasion of sharing their DIY creations with each other.
Here are the top 10 best (& easiest) designs we found:
1. Pool Noodle DIY Dog Cone
Top Dog Tips has a popular tutorial on how to make dog cone out of a pool noodle.
Difficulty: Easy
What You'll Need:
- Twine
- Pool needle
- Scissors
- Serrated knife
How It's Made:
Measure your dog’s neck. Cut a piece of twine that’s a couple inches longer than your measurement so you can tie it together like a dog collar.
Using a serrated knife or other tool, cut small 1.5 to 2 inch pieces of pool noodle and thread the twine through them. The length of the pieces can vary depending on the size of your dog.
Tie the collar together and move the pool noodles around to fit evenly. Trim any excess twine.
Make sure the pool noodle dog cone isn’t too tight or loose, and that your dog can move freely but can’t move her head enough to lick or bite themselves.
2. Cardbord E-Collar
AnimalWised released a guide on how to make a dog cone from another common household material – cardboard!
Difficulty: Easy
What You'll Need:
- Cardboard
- Ruler
- Pencil
- Compass
- Box cutter
- Tape
How It's Made:
To start your DIY cardboard dog cone, divide a large square piece of cardboard into 8 triangular parts using a pen or pencil. Connect the triangles by drawing your outer circle, the size of which will depend on the size of your pet.
Cut off the extra cardboard, leaving a circle with 8 triangles drawn on. Measure your dog’s neck and cut out the inner circle of the e-collar with a box cutter.
You should be left with a donut-shaped piece of cardboard. Make a cut on one side so you can adjust the size and shape to fit your pet.
Place some tape on the edge your dog will wear so their neck isn’t cut by the cardboard and tape the two ends of the collar in place using a strong adhesive tape.
3. Homemade Towel Dog Cone
Dog Training Nation shares an effective homemade dog cone alternative using a towel that is much more comfortable than your standard vet-issued one.
Difficulty: Easy
What You'll Need:
- Duct tape
- Towel
- Helper holding a plate full of smeared peanut butter
How It's Made:
Lay the wide side of the towel out in front of you. Fold one side towards the middle, then the other side over the first side. You should end up with what looks like a thick scarf.
Cut three medium sized pieces of tape. This video recommends having a helper hold a plate of smeared peanut butter to help keep your dog busy during the process of putting the towel collar on! Take the thin side of the towel and start wrapping it around your dog’s neck, above the shoulders but under the ear.
It’s okay if you need to scrunch the towel a little to get this fit. Place a piece of tape along the top and bottom of your towel, making sure it is all pulled together snuggly. A third piece of tape covers the middle.
To make sure it’s loose enough, make sure you can put your hand all the way through the collar. It should be easy but there shouldn’t be a lot of extra space. Make sure your dog’s ears are out and turn the towel collar so the thick side is in front. This will make it harder for your dog to move their head or look down to lick themselves.
4. Neck Pillow
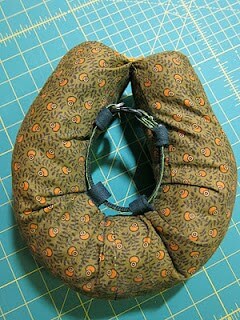
Source: Red-Handled Scissors
This hack is so simple it doesn’t even need its own post or video to explain it. If you happen to have a travel pillow that goes around your neck you may have everything you need!
Difficulty: Easy
What You'll Need:
- Neck pillow
How It's Made:
Depending on the size of your dog, an inflatable neck pillow can be a perfect way to keep your dog comfortable and safe during their recovery.
Some feature buttons to keep them on, but if yours doesn’t you may need to find a way to hold it on your dog’s neck. A tutorial on Red-Handled Scissors’ blog showed where they sewed tabs into the seams of a homemade neck shaped pillow so it could attach to their cat’s collar.
Taking this DIY e-collar on and off your dog is effortless, and it requires minimal work on your part if you have a neck pillow around that you don’t mind sacrificing for a good cause.
5. Bucket E-Collar
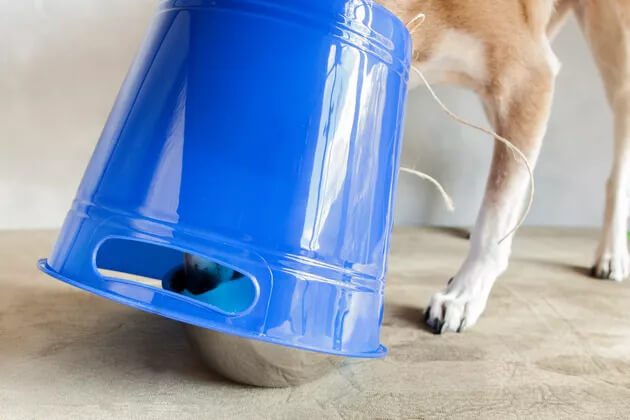
Source: Cuteness.com
Cuteness.com describes a simple but genius e-collar hack that’s sturdier than most ideas listed here, if you need something your dog can’t destroy.
Difficulty: Intermediate
What You'll Need:
- Bucket
- Sturdy knife/cutter
- Tape
- String
- Scissors
How It's Made:
Measure your dog’s collar and leave an extra inch or two for their ears to fit through. Cut a hole that size on the bottom of a bucket.
Apply tape around the edges of the bucket so it doesn’t irritate your dog’s skin and smooth out any sharp edges. Use scissors to poke two holes an inch apart, on both sides of the bottom of the bucket. Put a piece of string through the holes on each side.
Slide the bucket on your dog’s head. To make sure they can’t take the bucket off, tie the string on either side to their collar.
6. Styrofoam Collar
The styrofoam e-collar is similar in execution to the bucket e-collar, just remove the bottom. Although there aren’t any how-to instructions for it online, it's really easy to do.
Difficulty: Easy
How It's Made:
- Styrofoam bowl
- Sturdy knife/cutter
This method works best on a smaller dog, whose neck is smaller than the circumference of the bottom of a styroafoam bowl.
Measure your dog’s neck or collar and cut a hole with a little extra room for your dog’s ears.
There you have it, a soft and comfy collar for your small pup!
7. Egg Crate Foam E-Collar
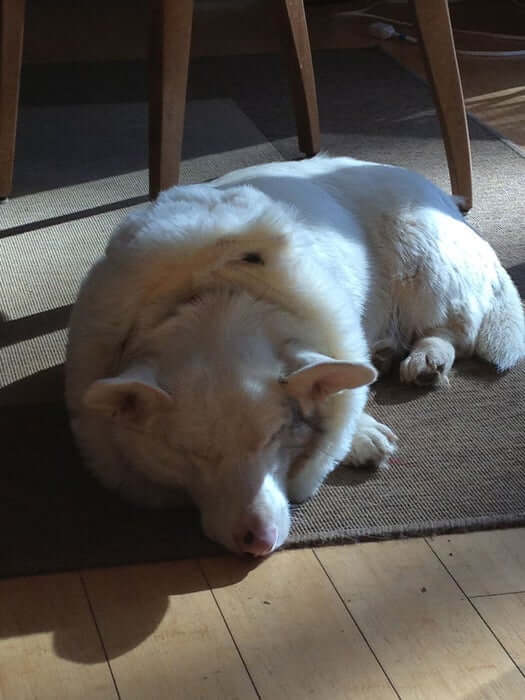
Source: Instructables.com
Corgi owner, SpeltBaker over at Instructables.com teaches people a FABULOUS alternative to the cone. This a great project for all breeds - small, medium and large.
This DIY is best for dogs who need to avoid licking their backs or bellies, not so much for the front paws/legs.
If you're looking for an inexpensive way to make a homemade soft dog e-collar that is more permanent here's what you need and how to do it.
Difficulty: Intermediate
What You'll Need:
- Measuring tape
- Pen and paper
- Thick foam (key to keeping your dog's head stabilized) like egg-crate style foam
- Sturdy knife/cutter
- Extra wide velcro
- Fake fur
- Needle & thread
How It's Made:
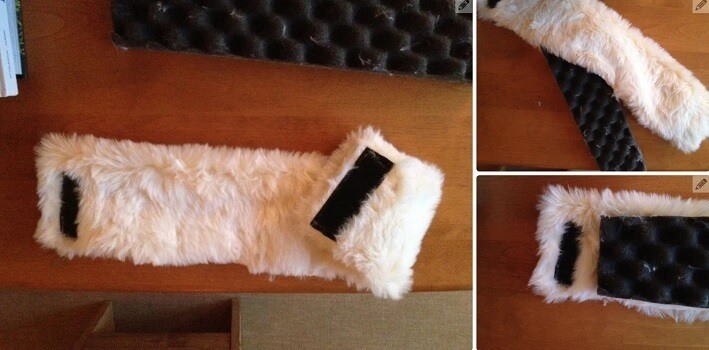
Start by taking two measurements: around your dog’s neck and the from the back of the ear to the shoulder
This will tell you the height and width of foam you will need (make sure to add a futher 4-6 inches to the length so it’s not too tight) for extra comfort.
Cut out the foam adding a few of inches lengthwise for a Velcro flap.
Lay the foam on top of the fake fur and measure it with extra for seams.
Sew around the edges, leaving one side open.
Sew Velcro on the end of the flap and the part where the pieces of foam will meet so the collar is held together firmly.
Try it on your dog and make adjustments as needed!
8. Plastic (Vynil) Cone

This tutorial on byMamaWithLove is a little more complex than most of the DIYs featured here, but it makes a more traditional e-collar. This DIY is sturdy, and an optional fabric cover can be added to make it more comfortable.
Difficulty: Hard
What You'll Need:
- Paper
- Something to draw your circle
- 1 yard of vinyl
- 1 yard of fabric
- Pencil
- Scissors
- Touch tape, strong hook and clasp, or buttons
- Sewing machine and thread
How It's Made:
Start by getting an idea of how big your dog’s neck is. Cut a paper pattern with an inner circle that will comfortably fit around your dog’s neck. The outer circle should be wide enough so your dog’s mouth can’t easily reach anywhere it shouldn’t (to lick a wound or stitches, for example).
Next, cut into one side of your circle and try out the cone on your dog’s neck to see how big it needs to be. Adjust your cone size and cut a piece of vinyl using your fitted paper pattern.
Next, cut two pieces of fabric (one for the outside and one for the inner lining) to match your cone shape. Sew the two pieces of fabric together, leaving one side open for the vinyl to slide in.
Add your desired closing method (buttons, a clasp, or Velcro), and then sew a 1 inch wide piece of vinyl to the inner and outer edges to make the collar sturdier.
9. Paper Plate Cone
Quick solution to an alternative e-collar. The paper plate cone is simple and easy to make.
Best suited for small and extra small breeds.
Quick solution to an alternative e-collar. The paper plate cone is simple and easy to make.
Best suited for small and extra small breeds.
Difficulty: Easy
What You'll Need:
- Paper plate
- Scissors
- Tape
How It's Made:
Cut a hole in the middle of the plate that is large enough to slide over your dog’s head. You can start by measuring their head or collar and adding an extra inch or two.
You can also cut out a cone shape, put it on your dog to get the desired fit and tape it closed.
This solution is good in emergencies when you need your dog not to pick at a wound before you can get it cleaned and assessed by a veterinarian.
Make sure your makeshift e-collar is loose enough to fit comfortably without sliding off and you’re set.
10. Sock Cone of Shame
Another great option for smaller dogs is using a tube sock filled with plastic bags and fastened with rubber bands.
Difficulty: Easy
What You'll Need:
- Tube sock
- Rubber bands
- Plastic bags
How It's Made:
Use a tube sock filled with plastic bags, fabric or other lighter socks and fastened with rubber bands.
This option is super simple, uses materials most people have around the house, and doesn’t involve cutting anything so no risk of injury! You don’t need to take measurements, as long as your dog’s neck is smaller than the sock you’re using you can use trial and error to get the right fit.
Just make sure the fit is comfortable for your dog and everything is secured properly. This make your own soft e collar is lighter and much more comfortable than most pet head cones.

